Skyrim:Hag's End
| To meet our site's higher standard of quality, this article or section may require cleanup. The user who placed this here had the following concern: items on page need to be checked for leveled lists To leave a message about the cleanup for this article, please add it to this article's talk page. |
|
|||
|---|---|---|---|
| # of Zones | 1 | ||
| Clearable | Yes | ||
| Dungeon | Yes | ||
| Respawn Time | 10 days or 30 days | ||
| Level | Min: 14 | ||
| Occupants | |||
| Hagraven, Hags, Witches, Frostbite Spiders, Ice Wraiths | |||
| Important Treasure | |||
| Mystery of Talara, Part 4 Bloodthorn Predator's Grace Ancient Shrouded Armor |
|||
| Console Location Code(s) | |||
| HagsEnd01 | |||
| Region | |||
| The Reach | |||
| Location | |||
| West of Dragon Bridge East of Deepwood Redoubt |
|||
| Special Features | |||
| Word Wall | Slow Time | ||
| # of Alchemy Labs | 1 | ||
| # of Arcane Enchanters | 1 | ||
| # of Cooking Pots/Spits | 1 | ||
| Ore Veins | |||
| # of Quicksilver | 1 | ||
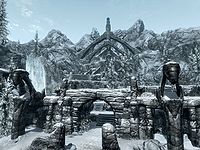
Hag's End is a small Nordic ruin west of Dragon Bridge containing a hagraven, hags, and witches. It contains only one zone, Hag's End.
Once inside, a hagraven leader will engage you in combat, and will teleport to different rooms as you deal damage to her and kill her minions.
Related Quests[edit]
- Dungeon Delving: Do a favor for Igmund, the Jarl of Markarth, by retrieving a shield. (radiant)
- Locate the Assassin of Old: Find the Dark Brotherhood Assassin.
- The Words of Power: Follow the Greybeards' advice to learn a Word of Power from a word wall. (radiant)
Walkthrough[edit]
Exterior[edit]
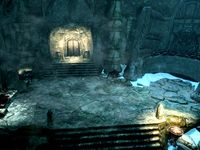
Hag's End is found within Deepwood Vale, which is only accessible via Deepwood Redoubt. The entrance to the redoubt is in the mountains west of Dragon Bridge, south of the barrow Volskygge.
Hag's End[edit]
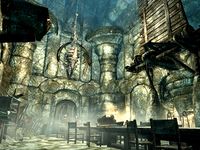
Upon entering, to your right is a lit brazier atop a stand and to your left is a sideboard with a shelf. On the sideboard are a sample of bone meal and a horker tusk. Opposite you is a stone table with a cup on it. The corridor ends at an unlocked iron door on the left. Through the door is a dining hall, where you will encounter the hagraven leader and two witches. Once you initiate the fight, a third witch will run into the room from the room on the left. After you have dealt some damage to the hagraven, she will teleport to a room on the third floor. In the dining room is a very long table with a total of eleven chairs along the sides. On the table are a sabre cat snow pelt, a sabre cat pelt, two hagraven feathers, a stone bowl that contains a hagraven claw, and two wooden plates, one with a charred skeever hide, and one with a baked potato. On your left is a wooden door to what looks like a bedroom. To the right of the door are a sideboard and, on the floor, a stone bowl which contains a horker tusk. On the sideboard are a mammoth tusk, a horker tusk, and a sliced goat cheese. To the right of the sideboard is a cupboard with nothing of interest. At the far end of the room is another wooden door with a path heading northeast. In the middle of the southeast wall is a fireplace with a cooking pot in front of it. On your right as you first enter the room is a stone bench, and to the left is a stack of three barrels and three sacks.
As you enter the bedroom, on your left there is a stone table with an alchemy lab inset. To the left is a potion of plentiful magicka, and to the right is a bowl of bone meal. There are five single beds in the room; between the second and third from the left is a horse hide on a piece of rubble, and between the third and fourth is a random pair of boots. There is an end table to the left of the fifth bed. Between the fifth bed and the door is a sideboard, on which are some mage robes and a random potion of healing. In the middle of the room is a double sideboard with a lit brazier on top. Around the brazier are a scroll of Firebolt, a pair of random gauntlets, and an iron dagger.
Through the door to the northeast is a short corridor with a flight of stairs up on your right-hand side. Ahead is a room with snow; be careful as there are also three frost runes on the floor, one ahead and one to either side. At the rear of the room is a random piece of chest armor on a broken table with a burial urn just in front of it against the wall, and in the snow at the back of the room is a bowl. Against the north wall is a broken sideboard with a mead barrel, a bowl, and a burial urn on top, with a rabbit hanging from a rack above. To the left as you enter the room is a bookcase containing a hunting bow and two potions of minor healing. There is a large urn to the right of the bookcase. There are a set of shelves, two barrels, and a small set of shelves on the right as you enter, but they hold nothing of interest, except a bowl on the larger set of shelves. Be careful when activating the runes, as they will blow everything around the room.
At the top of the flight of stairs is a pressure plate activating a battering ram from your left. To the left is a stand holding an empty random soul gem. In front of you is a sideboard with a statue above it; on the sideboard are two burial urns and an apprentice-trapped chest which activates a poison dart trap fired from the statue in front of you. The path continues to the southwest up a few steps to an unlocked wooden door.
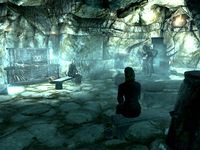
Opening the door will reveal the hagraven sitting on her throne with two witches sitting facing her on either side. Again once you have dealt enough damage, the hagraven will teleport to a higher level. Initiating the fight will alert others to your presence; however, they can not get into the room until you drop a wooden bridge, which is on your right as you enter the room, with the lever to the right of the bridge. On your left as you enter is a stone table with a copy of the Illusion skill book Mystery of Talara, Part 4. There are four benches at an angle in front of the throne. Against the southeast wall are two sideboards on top of each other with a random potion of healing on top. Behind the throne is a hidden room in which you can find the Assassin of Old. The switch used to enter this hidden room is right behind the throne, but it will not appear until you have started the associated quest.
As you cross the wooden bridge, be careful not to alert a hag that is just out of sight to the left of the corridor ahead. On the other side of the bridge the corridor climbs a few steps, and then there is an iron door on your left with a lit brazier opposite. In this room will be a hag, unless you have already dealt with it. A large frostbite spider will also descend from above in the center of the room and attack as soon as you enter the room. There are stone benches on either side of the entrance, with two bookcases along the southeast wall. The first has nothing of interest, but the second has a horse hide, a random helmet, and on top an ice wolf pelt. To the right is a throne, with a fireplace nearby. On a small wall shelf to the right of the fire, you will find the Hag's End key. There are a copy of The Legend of Red Eagle and a random poison on a sideboard against the west wall, and at least seven hagraven feathers in the straw in the center of the room.
Back in the corridor and continuing to the northwest, past a stone table and after climbing a few more stairs, you come to a junction. To your left is a master-locked gate that will unlock with the Hag's End key, and on your right is a dropped gate with a handle to its left. Through the locked gate, past a statue on either side is an unlocked expert-trapped chest with a coin purse to the right hiding the tension cable trapping the chest, with a random shield to the left. There are also dead draugr that can be looted in alcoves to either side of the chest. The trap on the chest activates flamethrowers from the two statues and from a third in the ceiling.
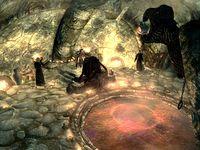
Return to the corridor and pull the handle to open the gate. Wait a few seconds before moving forward, as pulling the handle will also activate spear traps from either side; there is a series of three gates that open one after the other a few seconds apart, with more spear traps between each gate. At the top of the stairs you enter a room with the hagraven, a witch, and a hag. Like before, dealing enough damage to the hagraven will cause it to teleport farther up the ruin. After dealing with the other two enemies, you can explore the room. Things may get blown around this room during the fight, but there is a filled random soul gem and an empty petty soul gem on your right as you enter, among some rubble. There is an expert-locked iron door on the left against the northwest wall. There are two burial urns, one on either side of a raised area, with a plinth that has a copy of the Spell Tome: Flames, and also an urn on the near side beside the burial urn. There are many candles lit on the floor arranged in circles around the room. Opposite the iron door is a path blocked by a lowered gate. In the southern corner of the room is a small empty alcove blocked by an expert-locked gate. To the right is a second empty petty soul gem, and beside this is a stone bowl with a second filled random soul gem inside. Behind the iron door is a small area with a burial urn, a random battleaxe, a plate, a random helmet, and a potion of minor healing. There is also an oil lantern at the top of the pillar that can be shot down to set fire to the oil slick in the large circle in the middle of the room. Finally, on the pillar is a chain that activates the closed gate on the southeast wall.
Activating the chain will open the closed gate to the southeast and also a second gate at the far end of the pathway. This path has alcoves for the dead on either side, but no draugr; there is only a burial urn in an alcove on the right. At the top you enter a room with the word wall off to the right and stairs in front of you with an iron door opposite leading back outside, and a stone table on the left covered in blood and decapitated skeevers. In the eastern corner is an arcane enchanter. In the western corner is a burial urn that has nearly been completely buried in snow. The word wall teaches you part of the Slow Time dragon shout. There is nothing else of interest in this large room.
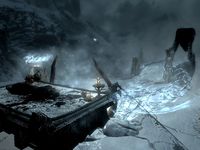
Exiting through the iron door opposite brings you out onto a balcony above Deepwood Vale and the final showdown with the hagraven. As soon as you exit, the hagraven will summon two frostbite spiders or ice wraiths, depending on your level, but they will not disappear when the hagraven dies and must be dealt with separately. Once they are all dealt with, there is a stone table in the middle of the balcony with a dead witch laid out on top. Beside her is a unique weapon called Bloodthorn, a steel dagger with a three-second soul trap enchantment. There are also three hagraven feathers and a sample of juniper berries on the table. On the northern end of the precipice is the boss leveled chest for this location.
Once you've dispensed with everything, work your way over to the waterfall (on the right, facing out to the vale) using mountain climbing or one word of Whirlwind Sprint. There is an expert-locked chest with decent loot with a pair of unique boots, Predator's Grace, next to the chest. Note the quicksilver ore vein nearby.
Notes[edit]
- Do not re-enter the trapped corridor immediately after pulling the chain in the room with the oil slick, as you are at risk of getting caught between the lowering gates. There is no way to open these gates from between them, and the only way out is to reload a previous save.
- If you don't want to enter Hag's End but want the unique boots, Bloodthorn, and both boss chests, you can climb the steep hillside to the left of the door to the building and reach the top of the waterfall, where the Predator's Grace, quicksilver ore vein, and first boss chest are. Afterwards, you can head far left on the hill and get as close to the platform of Hag's End as possible, then simply leap over near the other boss chest, Whirlwind Sprint not required. From there, you can loot the other boss chest and get Bloodthorn.
Bugs[edit]
- After getting the first word of the Slow Time shout from elsewhere, the word wall may not work properly. The wall's sound effects can be heard but no word is learned when the wall is approached.
- The oil slick doesn't appear. ?
- If you soul trap the hagraven before the final encounter with the Black Star empty, the hagraven will teleport away and you will permanently lose the Black Star. ?
- If you manage to kill the hagraven in the first room, there is a chance she will not appear at the end of the dungeon, though you can hear her teleporting ahead. ?
- After the hagraven disappears in the first room, moving through the hallways may cause a crash to desktop when her spawn in the next room is triggered. ?
- Even if you manage to kill and possibly soul-trap the hagraven in one of the interior rooms, she will still appear on the final balcony and you will have to deal with (and optionally soul-trap) her again. She may also reappear in one of the Forsworn tents at ground level, where she will be paralyzed and can be "killed" (and soul-trapped) again.
- Skyrim-Places-Nordic Ruins
- Skyrim-Places
- Skyrim-Places-Level 14
- Skyrim-Places-The Reach
- Skyrim-Places-Quicksilver Veins
- Skyrim-Places-Alchemy Labs
- Skyrim-Places-Arcane Enchanters
- Skyrim-Places-Cooking Pots
- Skyrim-Places-Word Walls
- Skyrim-Places-Clearable
- Skyrim-Places-Discoverable
- Skyrim-Places-Hagraven Nests
- Skyrim-Confirmed Bugs
- Skyrim-Unconfirmed Bugs
