Skyrim:The Staff of Magnus
| This page is currently being rewritten as part of the Skyrim Quest Redesign Project. The page is being rewritten and checked in several stages. All users are welcome to make changes to the page. If you make a change that is relevant to the project, please update this template accordingly, and make sure you have observed the project guidelines. Details Walkthrough: written by Beezer1029, not checked Reward: written by multiple users, checked by Beezer1029 |
|
Quick Walkthrough[edit]
- Travel to Labyrinthian.
- Kill the dragon priest Morokei.
- Retrieve the Staff of Magnus.
Detailed Walkthrough[edit]
To Save the College[edit]
After the Containment quest, you must leave the college at Mirabelle Ervine's behest, outfitted with the Torc of Labyrinthian and Savos Aren's Amulet. Your destination is Labyrinthian, which will be marked on your map, where you must retrieve the Staff of Magnus in order to contain the Eye of Magnus.
Labyrinthian sits nestled in a pass through the mountains southeast of Morthal. It can be approached from the north or south end of the pass. Following the quest marker, at the top of one of the many staircases, you will arrive at the Ceremonial Door, which is the entrance to the ruin's interior. Here a ghostly after-image of a younger Savos Aren and five adventurous mages from the college, Atmah, Girduin, Takes-In-Light, Hafnar Ice-Fist and Elvali Veren, will appear. Apparently, the late Arch-Mage had explored the ruins before and the apparitions will replay their experience as you progress through the ruins.
Labyrinthian[edit]
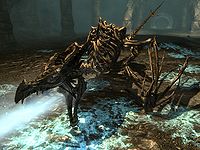
The Labyrinthian indoor ruins are fairly straightforward and guarded by a number of undead. The entrance room is littered with skeleton corpses; at the opposite end of the room, on your right, you will find a spell tome on an altar.
Proceed through a passage leading to a closed gate opening on a wide room. Levers on each side of the gate can be used to raise it, but it will fall down after a few seconds. A number of skeletons await beyond the gate, as well as a Skeletal Dragon. It is possible to raise the gate and shoot through the open entrance without entering. You can thus eliminate the skeletons and even the dragon before going into the room.
In addition, the dragon doesn't seem to be able to fit through the gate, so if you have entered, you can retreat back through it to take cover. Loot the cavern and descend the stairs where another ghostly scene will relay the events of Girduin's death. Take a moment to read the etched tablet introducing visitors to the great city of Bromjunaar, then proceed into the Labyrinthian Chasm.
Opening the door, you will find twin staircases leading down. Check the alcove on the right for a hidden chest, then take the right-hand staircase down. When you emerge into the chamber you will hear Morokei's voice, resonating with glowing power, addressing you in the dragon language "Wo meyz wah dii vul junaar?".
As he speaks, a large portion of your magicka will drain. As his voice subsides, a closed door is apparent. The door seems to be covered in ice, and then, as if to confirm, a frost spirit will emerge from the doorway. A draugr is also standing in one of the alcoves in this room. After removing the enemies, locate a flames spell tome which is in an alcove nearby. Cast a flames spell at the icy door to melt the ice crystals and open the door.
Entering the chasm beyond, Morokei will again address you, draining your magicka: "Nivahriin muz fent siiv nid aaz het". From the doorway, you will see a draugr standing below; an easy target for a ranged attack. There are several more draugr roaming this area, so be on guard. After eliminating the threat, enter the tunnel to find a door guarded by a lightning rune. Behind the door, another draugr is in a small room with the Equilibrium spell tome.
Return to the chasm and descend another level. There are several more draugr roaming this area, so be on guard. Here, the passageway will fork, with a bridge in front of you and a side passage continuing deeper into the chasm. You will hear Morokei's voice once again, this time speaking in your "guttural" language, trying to engage you in conversation.
Either path, across the bridge or along the side wall, lead to the bottom of the chasm; however, the bridge features more draugr. Beyond, the cave leads to a river running through the chasm. A door at the far end of the passage leads to the next section of the ruins. Approaching the door, you hear Morokei plaintively asking for Aren.
Labyrinthian Thoroughfare[edit]
Once inside open the next gate that leads to a sunken cavern strewn with stalactites and stalagmites. Haunting this cavern is a skeleton and a draugr. Once you eliminate them, you can either open a novice-locked gate to the west, or take a passage to the north. If you open the gate take a few steps downstream and turn right. Travel through the small room and proceed onward.
If you take the passage to the north, you will arrive at the same place after meeting a skeleton. As you travel through, Morokei speaks to you once again, this time taunting you as your magicka drains away.
The next large room you come to is occupied by a troll. There are three barred windows providing a view of the next multi-leveled cavern. The entrance to this cavern is located to the right of these windows. In the next cavern, you will hear from Morokei goading you once again.
You will battle more skeletons as you descend into the cavern. At the first landing is a bridge heading west. This leads to a small room with two trolls and a chest. Go down the second set of stairs to the lever-controlled gate.
When you approach the gate, Morokei will again speak to you, this time recognizing that you are not Savos Aren. As Morokei has depleted your magicka again, wait for it to regenerate, if you wish, before opening the gate. Beyond the gate you will find skeletons and a swarm of wisps as well as a wispmother.
If you turn left through the gate, keep turning left and you will find 2 well-hidden flights of stairs in a corner; at the top are two skeletons (including a magic-user), an unlocked chest and a random aversion potion. You can jump over a dividing wall to kill/loot the skeletons if necessary, or just leave them be. Climb back down the stairs to ground level when you're done and proceed.
Go up a short flight of stairs in the west corner and across the raised dais to a door sealed with fire. As you approach, you will hear Morokei acknowledge that your power feeds his own, and then a fire spirit will spawn and attack.
Once the spirit is dead, cast a frost spell on the door to open it. If you do not yet have a frost spell, a Frostbite spell tome or ice-based scrolls can be found on a round table to the left of the door.
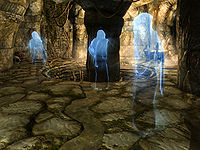
Beyond this door you will find a short passage and a gate leading into a circular room. As you enter, another vision of young Savos Aren and his companions will appear, their numbers somewhat depleted by now.
The next room is guarded by a skeleton, a Spectral Warhound and a ghostly draugr wight. Be careful as you approach; Morokei's voice invites you to your doom while draining your magicka once again. A cascade of water flows into a trap door in the floor, and there is a passage onwards.
Either the trap door or the passage lead to the same room below, however, if you open the trap door and do not land on the log to break your fall or otherwise protect yourself, the fall is likely to kill you. Through this tunnel system you will meet more draugr wights. Fighting through you will find the door leading to the next zone, Labyrinthian, Tribune.
Labyrinthian, Tribune[edit]
Proceeding a short distance past the door, you will encounter two ghostly draugr wights, one of them a boss, and another spectral warhound. Around the next corner you will find a spell tome for Steadfast Ward on a podium.
Go down the stairs and into a room with three spellcaster traps that will unleash powerful destruction spells at you. There is a frost rune on the floor midway down, and another guardian may await at the other end of the room.
Next, go up a short flight of stairs to a ledge overlooking another cavern with a small pool below and another draugr. To the left is a wooden ramp up to a room and two additional spectral draugr along with some loot. To the right is a dirt path leading down to the room below.
Exit the cave and at the end of the corridor you will find a skeleton shackled to a wall with a leveled dagger in its chest. To the left, an adept-locked gate leads to a few valuable items and the unique item Ancient Helmet of the Unburned.
To the right is a set of iron doors. When you approach the doors, you will see the visual phenomenon of Morokei's voice, but no voice is heard. However, your magicka will be drained again.
Open the doors to see a throne facing away from you with a high-leveled draugr attended by a Spectral Warhound companion. Once the fight is over, you can approach the word wall to the southwest of the throne to learn a word of the Slow Time shout.
On the opposite side of the room to the word wall, you can pass through the right side of the tree to find a chest hidden behind a rock.
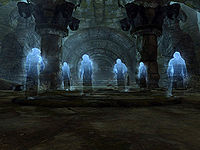
After the throne room, you will enter a corridor with a series of columns on each side. Progress with care, as you will experience another magicka-draining effect, and activate a group of skeletons and ghostly draugr.
At the opposite end of the corridor, the ghostly Savos and a diminished band of his companions lament that not all of their number have made it this far. One of them mentions a feeling that the final trial lies beyond the next door, and they vow to stick together and move forward. Open the iron door to the south.
The battle against the Dragon Priest[edit]
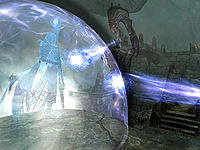
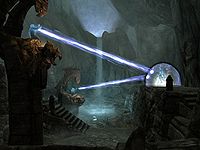
As you enter the large room, Morokei is completely protected by an energy shield cast by two enthralled wizards. You will soon learn that they are two of Savos' companions that were sacrificed to keep the dragon priest contained so Savos could escape.
You need to remove the wizards and their casting in order to access Morokei. A variety of strategies and techniques can be used to win this encounter; suggestions and tips are below:
- The mages can be targeted from the corridor leading to the room, allowing you to replenish your resources before engaging Morokei. Drainspell Bows (from the ghostly draugr encountered in Labyrinthian) have been proven to be effective against the mages. You can also use the doorway to your advantage by opening and closing the doors when engaging Morokei.
- The platforms around the walls of the room provide elevated positions that should provide you with an edge in the fight. It is possible to climb the wall immediately to the left and approach from above. You can sneak attack both wizards and have a good vantage point to attack Morokei.
- Morokei can conjure a storm atronach and employs Command Daedra and seems to prefer ranged and magical attacks, avoiding fighting at close quarters. Most of his offensive spells are shock based, so equipping yourself with enchanted items such as Zahkriisos'DB and Otar's masks or using potions to resist shock damage will severely hamper his attacks.
- It appears that if you can back him into the small pool in the room, he cannot get out of the water, which traps him, but he can still fight back.
- If you get his health down a bit, then switch to a low power constant-effect spell or staff (e.g. Staff of Sparks), he'll keep his costly ward spell up constantly and deplete his own magicka. When he runs out of magicka he's powerless.
- He can turn your summons against you. If he does, then you recast the summon and get a new one, he won't turn them more than once or twice. However, he cannot manipulate Flaming Familiars, acquired from protecting Anska in High Gate Ruins, though completing that quest requires you to confront another dragon priest.
- At a high enough level, it is possible to summon a Dremora Lord against Morokei; he cannot turn Dremora as he can Atronachs. Beware Morokei's range, and note that the first rank of the Summoner Conjuration perk is sufficient to close the distance between platforms.
- The Enthralled Wizards can be frenzied using illusion spells and seem to be surprisingly resilient to Morokei's attacks. They can be used to soften him up or even kill him.
- Spell Absorption will cause Morokei's attacks to replenish your magicka rather than depleting it.
- You can also call on a mage-type follower, such as SeranaDG or Erandur, to drain his magicka pool with lightning spells, or have them attack head-on while you flank the dragon priest.
- There are two platforms that the mages were standing on keeping Morokei imprisoned. If you stand on the higher platform, keeping a few feet from the edge so that you are between the pillars holding up the dragon head and use ranged attacks (preferably arrows poisoned with damage magicka regen) against him so that the lower half of his body is eclipsed by the small flame pits that hang over the edge, when he returns fire his lightning spells will scatter off of the surroundings leaving you completely unaffected with him under the impression that you are taking damage. If your follower is keeping him busy on the lower platform across from it so that he cannot come down the stairs this can make for a quick fight.
Once the dragon priest has been defeated, collect both Morokei's mask and the Staff of Magnus. Your next objective will be to return to Tolfdir.
Problems at Home[edit]
Proceed through the door toward a shortcut out of Labyrinthian. Savos will again manifest, apologizing for sacrificing his companions to keep the Dragon Priest imprisoned, and swearing to seal the ruin. Unbar and open the wooden door.
As you open a gate to the next room, Estormo, a Thalmor mage and associate of Ancano, will enter the room from the other side and block your path. He will tell you that he will take the Staff from you because Ancano wants it kept safe, and also wants you dead. Optionally defeat Estormo, and leave Labyrinthian. Outside, you will not be able to fast travel to the College. The nearest destination to which you can fast travel is Winterhold. Once you arrive there, enter the gate to the College. You will find Tolfdir, along with Faralda and Arniel Gane battling magic anomalies.
Once the anomalies are gone, speak to Tolfdir. He tells you that Ancano's power is growing, and that they cannot stop him. He ruefully hopes your trip to Labyrinthian was worth it. If you ask about Mirabelle, Tolfdir will tell you that she is dead; killed while ensuring everyone's escape from Ancano. Tolfdir asks you to lead the group inside to deal with Ancano. This completes the quest and initiates the Eye of Magnus quest.
Notes[edit]
- The magicka drain associated with Morokei's voice is scripted and always drains all your magicka, even if you used the Fortify Restoration exploit to create game-breaking Fortify Magicka items. It is completely unaffected by Resist Magic or Spell Absorption effects from potions or apparel.
- Some of the optional quests cannot be completed while this quest is active. Characters in College of Winterhold may also become inactive.
- Both of the enthralled wizards in Labyrinthian Tribune are male, despite the fact that there was a female wizard remaining at the end of Savos Aren's endeavor.
- It is possible to kill both the enthralled wizards and Morokei without ever engaging combat. If one has a bow level of at least sixty, archery perks, high-damage arrows (preferably Ebony), and is sneaking just inside the doorway of Morokei's room.
Bugs[edit]
- On PC, if you dash up at top speed and use the Torc of Labyrinthian on the entrance door before Ghost-Savos and his friends have fully loaded, the game may continue to try to load them while trying to load the first interior area, and crash to desktop. ?
- After killing the skeletal dragon, it will sometimes reanimate. The cause is unknown but it may have to do with using powers such as Nightingale Subterfuge on it before engaging in battle.
- It is possible to receive two copies of the Staff of Magnus; the cause for this is unknown and presumed to be a scripting error.
-
The Unofficial Skyrim Patch, version 2.0.5, fixes this bug.
-
- Sometimes, the after-images of Savos and his companions will not engage in their intended dialogue, and stand still instead.
- One or more of the ghosts of Savos and his companions may be missing from their intended scenes.
- Estormo will become friendly again if you cause him to flee.
- Estormo may fail to arrive after you obtain the Staff of Magnus. ?
- Morokei may not attack at all, simply floating towards you and not doing anything.
Use the
prid 00086CF4thenkillconsole commands to kill Morokei; the quest will advance directly to "Find the staff of Magnus".
- It is possible to bypass the part of the quest where you fight Estormo by backtracking through the dungeon instead of using the shorter exit path. The quest will progress normally after this is done.
- If you are a vampire and it is daytime, you will take sun damage while inside the Labyrinthian, even if you are indoors. ?
- The quest may fail to start after completing Containment, and even trying manually start or end it with the console will not work.
- Try completing any quest related to Labyrinthian before starting Containment mission, for some unknown reasons the quest fails to start if there is another quest with marker pointing to Labyrinthian.
Make sure that all of the NPCs in the College of Winterhold are still present and enabled; For example, you may not be able to find Arniel because he is disabled. In order to solve this issue, simply open the console and type
prid <RefID>thenenableto re-enable a specific NPC.
- If you leave Labyrinthian early on (for instance, to stash or craft something out of the dragon bones after the Skeletal Dragon fight) and then come back, Morokei will sometimes not talk to the player character at all as they advance through the dungeon, but the Magicka drain effect will still happen. ?
Quest Stages[edit]
| The Staff of Magnus (MG07) | ||
|---|---|---|
| Stage | Finishes Quest | Journal Entry |
| 10 | I need to retrieve the Staff of Magnus from within Labyrinthian and return with it to the College of Winterhold. Only the staff will help me put an end to Ancano's abuse of the Eye of Magnus.
Objective 10: Enter Labyrinthian | |
| 20 | Objective 20: Find the Staff of Magnus | |
| 50 | I have recovered the Staff of Magnus, and need to get it back to the College at once.
Objective 80: Return to Tolfdir | |
| 80 | Objective 80: Return to Tolfdir | |
| 200 | I have recovered the Staff of Magnus. | |
| Unknown | Objective 30: Defeat the Dragon Priest
Objective 40: Retrieve the Staff of Magnus
Objective 50: Exit Labrynthian
Objective 60: Escape the Thalmor
Objective 70: Find a way out of Labrynthian | |
- The following empty quest stages were omitted from the table: 0, 30, 40, 60, 70.
- Any text displayed in angle brackets (e.g.,
<Alias=LocationHold>) is dynamically set by the Radiant Quest system, and will be filled in with the appropriate word(s) when seen in game. - Not all Journal Entries may appear in your journal; which entries appear and which entries do not depends on the manner in which the quest is done.
- Stages are not always in order of progress. This is usually the case with quests that have multiple possible outcomes or quests where certain tasks may be done in any order. Some stages may therefore repeat objectives seen in other stages.
- If an entry is marked as "Finishes Quest" it means the quest disappears from the Active Quest list, but you may still receive new entries for that quest.
- On the PC, it is possible to use the console to advance through the quest by entering
setstage MG07 stage, wherestageis the number of the stage you wish to complete. It is not possible to un-complete (i.e. go back) quest stages, but it is possible to clear all stages of the quest usingresetquest MG07.
| Prev: Containment | Up: College of Winterhold | Next: The Eye of Magnus |

