Skyrim:Halldir's Cairn
|
|||
|---|---|---|---|
| # of Zones | 1 | ||
| Clearable | Yes | ||
| Dungeon | Yes | ||
| Respawn Time | 10 days or 30 days | ||
| Level | Min: 6 | ||
| Occupants | |||
| Draugr, Ghosts | |||
| Important Treasure | |||
| Halldir's Staff Rjorn's Drum Spell Tome: Raise Zombie |
|||
| Console Location Code(s) | |||
| HalldirsCairn01 | |||
| Region | |||
| Falkreath Hold | |||
| Location | |||
| Southwest of Falkreath Southeast of Cracked Tusk Keep |
|||
| Ore Veins | |||
| # of Iron | 2 | ||
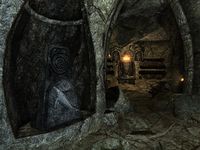
Halldir's Cairn is a small cave southwest of Falkreath containing draugr, ghosts, and the powerful undead mage Halldir. It contains only one zone, Halldir's Cairn.
Related Quests[edit]
- Dungeon Delving: Do a favor by retrieving an item from a cave. (radiant)
- Rjorn's Drum: Retrieve a drum for Giraud Gemane.
- This location is one of many potential targets for one or more of the Radiant quests.
Walkthrough[edit]
Exterior[edit]
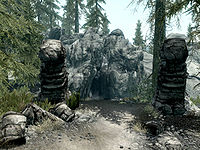
The path from the road west of Falkreath twists and turns through the rocks and past an unmarked hunter's camp before reaching the cave entrance. There are two fly amanita, one on either side of the entrance, and a burial urn to the right of the entrance.
Halldir's Cairn[edit]
There are two iron ore veins in the first chamber of the dungeon, one on the left as you descend into the chamber, and the other on a ledge north of the cairn. There are over fifty samples of various fungi in this chamber alone, comprising bleeding crown, blisterwort, fly amanita, imp stool, Namira's rot, and white cap. The entire dungeon contains 9 bleeding crown, 10 blisterwort, 12 fly amanita, 21 imp stool, 21 Namira's rot, and 22 white cap (though see bugs regarding one of the white cap patches).
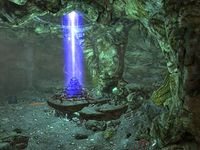
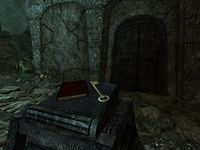
In the first chamber, a cairn emanating magical energy is surrounded by the dead bodies of three bandits: Agrius, Raen, and Vidgrod. Next to the cairn and the three bandit corpses are three bedrolls. On a nearby pedestal is Agrius's Journal, which tells the bandits' story, and the key to Halldir's Crypt, which unlocks the nearby adept-locked iron door, permitting further adventure into the cairn.
Just past the door, there is a stone bowl on the floor containing an empty random soul gem. The corridor ends in a wooden spiral staircase, with a random shield at the bottom. At the top, the corridor continues to the south into a flooded section, past a stone table on the left. On the sideboard to the left of the table is another empty random soul gem and a set of random gauntlets. Continue right past a burial urn on the left and two bookcases; an urn is farther along to the right. Two ghosts will appear and attack you just in front of an adept-locked wooden door. The crypt key will open this door as well.
Through the door are three thrones, one in front, and one to each side of you. A melee and magic-user ghost attack as soon as you enter. The path forks north and south here, with the north fork having a pressure plate that activates a spike wall in the dead end to your right. There is a random helmet in an alcove, and behind the spike wall is a broken table with a random potion on top.
The path continues to the south past a sideboard with two empty soul gems on top, then turns to the west and past some bone chimes that are fairly difficult to avoid and will alert a melee ghost ahead. To the right as you continue down the path is a broken sideboard with a random cuirass on top. Around the corner to the left is a dead end containing a slumbering draugr that will be alerted by any fighting, lying in an alcove with a medium coin purse on the ground. To the right up the staircase is an archer ghost standing next to a plinth holding a Spell Tome: Raise Zombie.
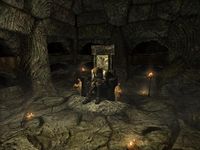
Continue past the plinth to see a draugr sitting on a throne. There is an urn on the left-hand side of the path; just past it is another draugr in an alcove. Two burial urns flank the throne, to the left is a random warhammer leaning against the wall, and in the northwest corner are two dead draugr that can be looted. The path to the east is blocked by a gate that can be opened with the lever behind the throne. Just before the gate, to the right is a random greatsword stuck in the rubble.
Through the gate, ascend a short flight of stairs to a small catacomb. To the left at the top of the stairs, you can see a small room with loot, but cannot reach it yet. Instead, turn right into the catacombs. It consists of four rooms in a square. The starting room contains a lever, and each of the other rooms has a symbol totem with a symbol on the opposite wall. The "eagle" room contains two ghosts, with a medium coin purse on the ground. The "whale" room contains a large coin purse, a leveled filled soul gem, and a random dagger on shelves in small alcoves. The "snake" room contains a slumbering draugr standing in an alcove to the right of an iron door, and a random mace and random gauntlets on a sideboard under the symbols of the snake. To the south is an apprentice-locked iron door behind which is an adept-locked chest, a random shield, and a random potion of magicka.
To progress, simply match the symbols and pillars, then pull the lever in the starting room. A rotating gate will open the way to a natural cavern with many fungi growing and a pool of water, in which can be found a medium coin purse and a random potion of healing. Continue down the path heading west to more catacombs, where two ghosts will attack. Farther to the west is an urn. The path to the left here leads to the area seen previously, but beware of the tripwire that triggers a battering ram. The treasure consists of a random warhammer and helmet, a filled random soul gem, a random healing potion, two burial urns, and a chest with an adept tension cable that sets off a flamethrower statue behind you.
Retrace your steps to stairs heading north to continue onward. Once you pass through the gate at the top, it will close, blocking your retreat. Halldir himself is a powerful draugr caster, who uses several Destruction spells. He'll begin to speak in an ancient Nordic tongue as you start to take away his health. At about 66% health, he will disappear and split into three different elemental versions of himself. All three are casters, and are spread out enough to make this part rather difficult; as such, magic resistance is recommended. The cold and fire casters are close to the room's entrance, while the lightning version is over by the throne at the back of the room. His Fireball spell can cause massive damage. Once you have defeated his three clones, he will rematerialize back in the room, ready to be killed.
Once he has been defeated, make sure you loot his remains and also claim his staff from the floor (see bugs). To the right of his throne is a boss chest. To the left of the entrance is a sideboard with a random pair of gauntlets; on the right sideboard is a random war axe. In the northeast corner of the room, you can find a burial urn, helm, armor, and warhammer (all random) on a table, and a medium coin purse and an urn on the bookshelves. The shelves in the southeast corner of the room contain an empty random soul gem, with another burial urn in the rubble to the right of the shelves. Finally, in the center of the room is a trapdoor that can be opened by activating it directly. It is above the cairn in the first chamber, which is now reduced to a pile of rubble.
Notes[edit]
- Halldir's clones are kept in a small room unconnected to the rest of the dungeon. You can see them by using the Aura Whisper shout in the first chamber of the dungeon. If you happen to kill Halldir before he summons his clones, you can still reach them by opening the console and typing
tcl, then "flying" into their room. The clones can then be killed and looted.
Bugs[edit]
- If not taken, the journal and key on the pedestal may disappear after the magical cairn collapses.
- One or more of the three named bandit corpses may disappear after the magical cairn collapses.
- One of the white cap patches in the catacombs cannot be harvested.
- Sometimes the puzzle totems will not activate.
- This can be fixed by reloading a save or exiting and reentering the dungeon.
- Picking up Rjorn's Drum before you receive the related quest may render it unable to be completed.
The Unofficial Skyrim Patch, version 1.2, fixes this bug.
- Halldir's Staff duplicates when you kill him. It is possible to find one copy on the ground and another on his remains.
The Unofficial Skyrim Patch, version 1.3.3, fixes this bug.
- You may be given a quest by the Companions to clear this location. However, some enemies may spawn out of reach outside the walls.
- They may be killed by using the Aura Whisper shout in the first open chamber, then using Conjuration spells when looking through the wall closest to the auras to summon creatures able to destroy the enemies.
The console command
killallmay be used to kill the enemies. Halldir's clones will then be able to spawn in the hidden room, thus activating Halldir.
- At times, invisible ghosts will appear. They can detect you, causing the eye to open when sneaking, while seemingly no one is there. The option to talk to them can appear when hovering over them, you can pickpocket them (they have nothing in their inventory), and when attacked, they respond like regular ghosts do. When killed, they will drop ghostly remains. ?
Maps[edit]
| This article could benefit from an image of: map See Help:Images for information on how to upload images. Please remove this template from the page when finished. |
