Online:Order of the New Moon
| This page is currently being rewritten as part of the Online Quest Project. The page is being both written and checked. All users are welcome to make changes to the page. If you make a change that is relevant to the project, please update this template accordingly, and make sure you have observed the project guidelines. Detail Quick Summary: written by MolagBallet, not checked
Quest Stages: written by HoodBot, checked by MolagBallet |
|
Quick Walkthrough[edit]
- Meet Aeliah Renmus at Senchal Palace and speak with General Renmus.
- Speak with Buzinda about her missing daughter.
- Find Kazahn at the Sweet Breezes Inn and ask him about Lahini's whereabouts.
- Follow the map to the recruiter's last known location and search the attic.
- Participate in the Black Kiergo Arena with Caska.
- Find the New Moon Fortress in the Tenmar Forest and speak with the fortress guard.
- Speak with Trial Master Zayri and undergo the trials to join the cult.
- Convince Lahini to leave the cult after the trials and investigate the fortress.
- Destroy the aeonstone and escape the New Moon Fortress.
- Return to the Dragonguard Sanctum.
Detailed Walkthrough[edit]
Aeliah Renmus knows that the Order of the New Moon is recruiting in Senchal, and she can get you in to see her father without an appointment so that you may speak to him about it. Head on over to Senchal Palace and enter the general's office. You will arrive at the tail end of a conversation between him and a woman named Buzinda, whose daughter is missing. General Renmus still can't spare anyone to help your investigation, but gives you clearance to do so yourself. He recommends speaking with the woman who just left, as she suspects her daughter may have been recruited by the Order.
Buzinda is lingering outside the general's office, grieving. She's elated that you've joined in the search for her daughter, and mentions that someone named Kazahn might know something about Lahini's whereabouts. He's refused to speak with Buzinda so far. You can find Kazahn downstairs at the Sweet Breezes Inn, drinking his days away with his friends Ranza and Dahjarsi. Today, he is accompanied by Za'ji and Caska.
Kazahn isn't feeling very talkative on the subject of Lahini, but if you (or Caska if you can't be persuasive enough) persuade him to tell you more, he confesses that Lahini has been hanging around the New Moon's recruiter, and that he and his friends followed him somewhere. Well, Ranza followed him, at least. Ranza offers to draw you a map leading to the place the recruiter stopped. He does so, and gives you a Crude Map. Follow the map outside to an abandoned house past the guild traders and above the harbor.
In the attic is a letter detailing orders to the New Moon recruiter, named Shirnama. The cult needs more warriors, so Shirnama is visiting a place called the Black Kiergo. Caska knows the place. When you're done investigating the attic, Aeliah and Caska will call up to you from the second floor. Tell them what you know, and ask Caska about the Arena. Caska tells you that the Black Kiergo is a fighting ring located in the outlaws refuge below Senchal. She was the undefeated champion before she retired, so she can probably get you in.
Enter the refuge and take the hallway past the merchant. Caska is waiting for you in front of the arena's entrance with the bouncer, Do'mazir. He won't let you in unless you can convince Caska to compete in the arena once more. She begrudgingly obliges, which grants you entry. Head on down into the ring and wait for the fight to start.
There are five rounds, the first four of which are fairly easy. The last round consists of fighting Do'mazir and Jiren-dar, a Dagi wind mage. Take them both down and head through the door to speak with Shirnama. He tells you that your strength is admirable, but is nothing against the Dragons. He then offers you a place in the Order of the New Moon, as they are looking for warriors such as yourself. He gives you a pendant, which you must show to the guard in front of the cult's fortress in the Tenmar Forest, east of Black Heights.
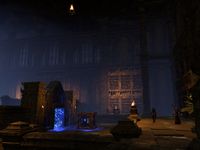
Head north through the maze and light the brazier on the other side of the doorway that the blue barrier is blocking entry through. Lighting the brazier removes the barrier. Once the barrier is down, push the Sliding Stone through the maze and onto the button in the center of the room. Press on to the New Moon Temple once you've opened the way with the Sliding Stone switch.
In the next room, you'll come across Lahini, who is fruitlessly kicking a Sliding Stone. Upon speaking to her, you confirm her identity and learn that she is struggling with the puzzle. Lahini asks if she can tag along with you, and rejoices when you allow it. She will run along the course as you clear the way for her.
Jump over the western railing and climb up the wooden structure to light the brazier. When lit, the way is open to push the cube through the hall. There is a second barrier at the end of the cube's track. Jump over the wall behind the barrier, climb the wooden platforms there, and light the brazier to open the way forward once more. For now, you should leave the cube here, but you can push it in front of the next barrier if you'd like. Don't push it past the third barrier, though. If you do, you risk getting it stuck. The third barrier contains the exit and two buttons for Sliding Stones to sit on. You're going to need a second Sliding Stone.
There is a fourth barrier past the third one. Pass through the doorway and push the cube through. Jump over the eastern wall and climb the wooden platforms up to the third brazier, which opens the exit barrier and closes the second cube's chamber off when lit, and renders the exit inaccessible while opening the way to the second cube's dwelling when unlit. When you have the second cube in the hallway, light this brazier and push both cubes onto their respective buttons (it doesn't matter which cube goes on which button; all that matters is that the buttons are pressed). Pass on through the door now that the way is opened.
The Trial Master is in this hallway with a large group of recruits. Speak with her. Apparently, there's some sort of ceremony taking place outside, where some will give their strength to the New Moon, and others, such as yourself, will be granted power. When the trial master leaves, you must speak with Lahini and convince her to go home. If you persuade her, she will leave. If you do not, she will stay for the ceremony. Caska arrives when you're done speaking with Lahini. She tells you that the green stone you found at the quarry is present in the ritual chamber, and there's a lot of it. She doesn't like the look of things, and wishes to observe the ceremony separate from the group that just went in. There's a balcony you can use to view the ritual from a safe distance. Navigate the side hallway and enter the New Moon Ritual Chamber.
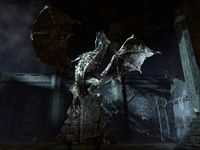
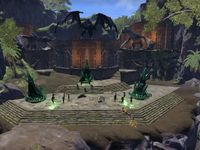
Laatvulon, the recruits, and two other Dragons: Joorahmaar and Paarbahlot are here. Laatvulon tells the recruits to offer their power to the New Moon, then he shouts, causing the green aeonstone to glow. Caska notices that there are two stones on the balcony. There are cultists presiding over them, but they are just as preoccupied as the recruits below. Caska wants to smash the stones. She'll take one, you'll take the other, and it is imperative that you destroy the balcony stones at the same time. Head on over to the stone on the right, and don't worry about the cultists. They'll give you no trouble. Smash the aeonstone and run through the door behind you as the Dragons fly off.
Laatvulon gives chase as you pass through the fortress. Cut a path through his minions and avoid his icy attacks. He will freeze you, spit ice balls at you, and when faced with a long pathway, he will fly along the path and bombard you with his frozen breath. Take cover when you can, and do everything in your power to survive the onslaught. Eventually, you'll be able to meet up with Caska near a river. You need to report back to Sai Sahan with your findings. The fortress drops you off behind the Colorworks at Black Heights. From there, head to the wayshrine and fast travel to the Dragonguard Sanctum to be rewarded by Sai Sahan for infiltrating the Order.
Bugs[edit]
- Before the trial, Caska fails to head to the room as she is instructed, remaining in place. The talk prompt remains visible but using it fails to bring up any dialogue. ?
- The same behavior occurs after speaking with Lahini the first time in the second trial area. ?
- During the second trial, sliding stones can be pushed through the last purple gate even when it is active. ?
- In the courtyard, it is possible to drop down from the balcony before having destroyed the aeonstone, due to the lack of invisible walls. Once down into the central area, Laatvulon and the other two dragons instantly disappear, and the only quick way to get back up to the balcony is to die by dropping into the nearby pit and using the wayshrine option. ?
Quest Stages[edit]
| Order of the New Moon | |
|---|---|
| Finishes Quest | Journal Entry |
| Aeliah agreed to help me get in to see her father without an appointment. I should meet her in front of Senchal Palace.
Objective: Meet Aeliah Renmus in Senchal | |
| If the Dragon cult is recruiting in the city, General Renmus should know something about it. I should speak to him.
Objective: Talk to General Renmus | |
| General Renmus confirmed that the Order of the New Moon is recruiting in the city. He believes their latest recruit is Lahini, a missing young Khajiit. I should speak to Lahini's mother Buzinda about her disappearance.
Objective: Talk to Buzinda | |
| Kazahn may know something about Lahini's disappearance. He's likely at the local tavern in Senchal, called the Sweet Breezes Inn. I should head there and find Kazahn.
Objective: Go to the Sweet Breezes Inn
Optional Step: Talk to Aeliah
Objective Hint: Talk to Caska | |
| I arrived at the tavern. I should search for Kazahn and speak with him.
Objective: Find Kazahn | |
| I found Kazahn drinking with his companions. I should speak to him and see if he knows where Lahini is.
Objective: Talk to Kazahn | |
| I convinced Kazahn to give us more information about Lahini. I should hear what he has to say.
Objective: Talk to Kazahn | |
| Kazahn's companion followed a New Moon cultist to the harbor. I should wait for Ranza to tell us about this encounter.
Objective: Listen to Ranza | |
| Ranza drew a map that will lead us to the New Moon cultist. I should take it.
Objective: Take Ranza's Map | |
| Ranza's map leads to a house near the harbor. I should locate this house and see if the New Moon cultist is still there.
Objective: Follow Ranza's Map | |
| I found the house on Ranza's map. Now I need to search for the cultist or find clues to his current whereabouts.
Objective: Explore House
Hidden Objective: Explore House
Hidden Objective: Fire Attack | |
| The attic apartment is empty, but a note was left behind. I should read it.
Objective: Read the Note | |
| The note states that the Order of the New Moon is recruiting in the Black Kiergo. I should see if Caska knows anything about this.
Objective: Talk to Caska | |
| Caska agreed to help me get into the Black Kiergo, an underground fighting ring located in the Outlaws Refuge. I should head there now.
Objective: Enter the Black Kiergo | |
| A Pahmar guards the entrance to the Black Kiergo. I should speak to him.
Objective: Talk to Do'mazir | |
| Do'mazir doesn't find me worthy of the Black Kiergo, but is eager to see Caska rejoin the fight. If I can convince my companion to enter the competition, we can both enter the arena and find the New Moon recruiter.
Objective: Talk to Caska | |
| To win an audience with the recruiter, I must compete in the Black Kiergo arena and prove my combat skills. I should fight as many enemies as I can. Caska will fight by my side.
Objective: Compete in the Arena | |
| I impressed Shirnama with my fighting skills. I should speak to him and see if he will tell me more about the Order of the New Moon.
Objective: Talk to Shirnama | |
| The New Moon recruiter gave me a pendant that grants entrance into the cult's base of operations, the New Moon Fortress. I should head there now.
Objective: Travel to the New Moon Fortress | |
| A cultist guard protects the New Moon Fortress. I should show her my pendant to gain entrance.
Objective: Talk to New Moon Fortress Guard | |
| The guard accepted my pendant and told me to speak to Trial Master Zayri. I should enter the New Moon Fortress.
Objective: Enter the New Moon Fortress | |
| I need to speak with Trial Master Zayri and see what task she has for me.
Objective: Talk to Trial Master Zayri | |
| I must complete the Path of the New Moon to prove myself to the cult. The trial master explained that I need to light braziers to open pathways and push the large sliding stones to unlock the door and move forward.
Objective: Complete the First Trial | |
| I successfully pushed the sliding stone onto a platform and unlocked the door. I should head to the next room.
Objective: Continue the Trial Path | |
| I found Lahini in the New Moon Fortress. It appears that she's also trying to complete the Path of the New Moon. I should speak to her.
Objective: Talk to Lahini | |
| I agreed to help Lahini complete the trial as well. I need to push the sliding stones onto platforms to unlock the door and light braziers to open barriers that block my path.
Objective: Complete the Trial Path | |
| I completed the Path of the New Moon. I should speak to Trial Master Zayri about my next step.
Objective: Talk to Trial Master Zayri | |
| I am now a member of the Order of the New Moon, but Lahini is still in danger. I should speak to her before continuing my mission.
Objective: Talk to Lahini | |
| Caska has also completed her initiation trial and wants to talk. I should speak with her.
Objective: Talk to Caska | |
| With Trial Master Zayri no longer watching over us, we can learn more about the Order of the New Moon. I should start my exploration.
Objective: Explore the Fortress | |
| Laatvulon is performing a ritual with the green stone I saw in the mines. I should observe the ritual.
Objective: Observe the Ritual | |
| Caska called me over. I should speak to her.
Objective: Talk to Caska | |
| The green stone, called aeonstone, absorbs the cultists' vitality. Caska wants to destroy the aeonstone and stop the ritual. I should follow her lead.
Objective: Wait for Caska | |
| Caska is in place. I should destroy the aeonstone.
Objective: Destroy the Aeonstone | |
| We interrupted the ritual, but Laatvulon is now aware of our presence. I should meet back up with Caska so we can escape the New Moon Fortress.
Objective: Meet Up With Caska | |
| Caska and I escaped Laatvulon and his cult. I should speak to Caska.
Objective: Talk to Caska | |
| Sai Sahan needs to know what I learned about the Order of the New Moon. I should return to the Dragonguard Sanctum.
Objective: Return to the Dragonguard Sanctum | |
| Sai Sahan needs to know what I learned about the Order of the New Moon. I should speak with him.
Objective: Talk to Sai Sahan | |
| I told Sai Sahan what I learned about the Order of the New Moon. I should speak to him about my reward.
Objective: Talk to Sai Sahan | |
<Alias=LocationHold>) is dynamically set by the game and will be filled in with the appropriate word(s) when seen in game.
- Not all Journal Entries may appear in your journal; which entries appear and which entries do not depends on the manner in which the quest is done.
- Stages are not always in order of progress. This is usually the case with quests that have multiple possible outcomes or quests where certain tasks may be done in any order. Some stages may therefore repeat objectives seen in other stages.


